


You are looking at the documentation of a prior release. To read the documentation of the latest release, please
visit here.
Azure Authenticator
Guard installation guide can be found here. To use Azure, create a client cert with Organization set to Azure.For Azure CommonName is optional. To ease this process, use the Guard cli to issue a client cert/key pair.
$ guard init client [CommonName] -o Azure
Deploy guard server
To generate installer YAMLs for guard server you can use the following command.
# generate Kubernetes YAMLs for deploying guard server
$ guard get installer \
    --auth-providers = "azure" \
    --azure.client-id=<application_id> \
    --azure.tenant-id=<tenant_id> \
    > installer.yaml

$ kubectl apply -f installer.yaml
Note: guard take
<application_secret>from environment variable AZURE_CLIENT_SECRET
Procedure to find <application_id>, <application_secret> are given below. Replace the <tenant_id> with your azure tenant id.
Configure Azure Active Directory App
Configuring Azure AD as a auth provider requires an initial setup by Global Administrator of such AD. This involves a complex multi-step process. Please see the video above to setup your Azure AD.
Sign in to the Azure portal. Please make sure that you are a
Global Administratorof your Azure AD. If not, please contact your Azure AD administrator to perform these steps.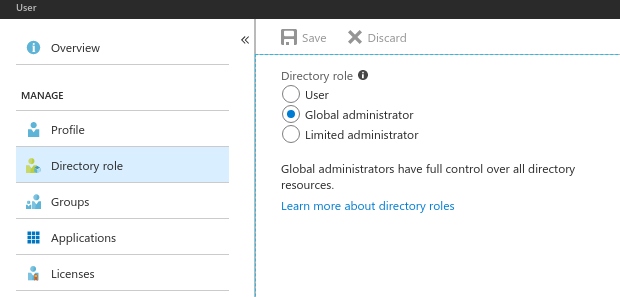
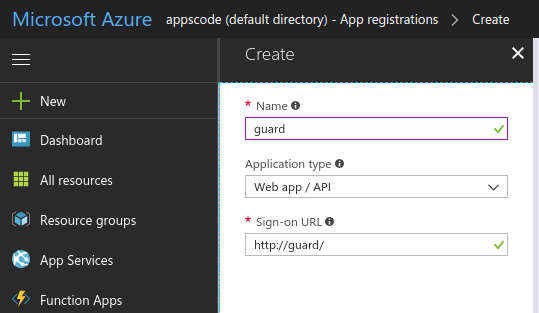
Create an Azure Active Directory Web App / API application
Use the Application ID as
<application_id>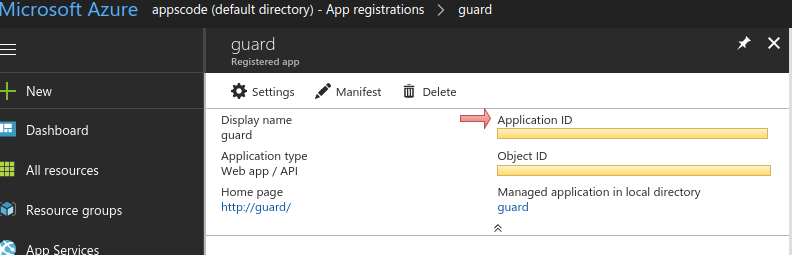
Click on the Settings, click on the key , generate a key and use this key as
<application_secret>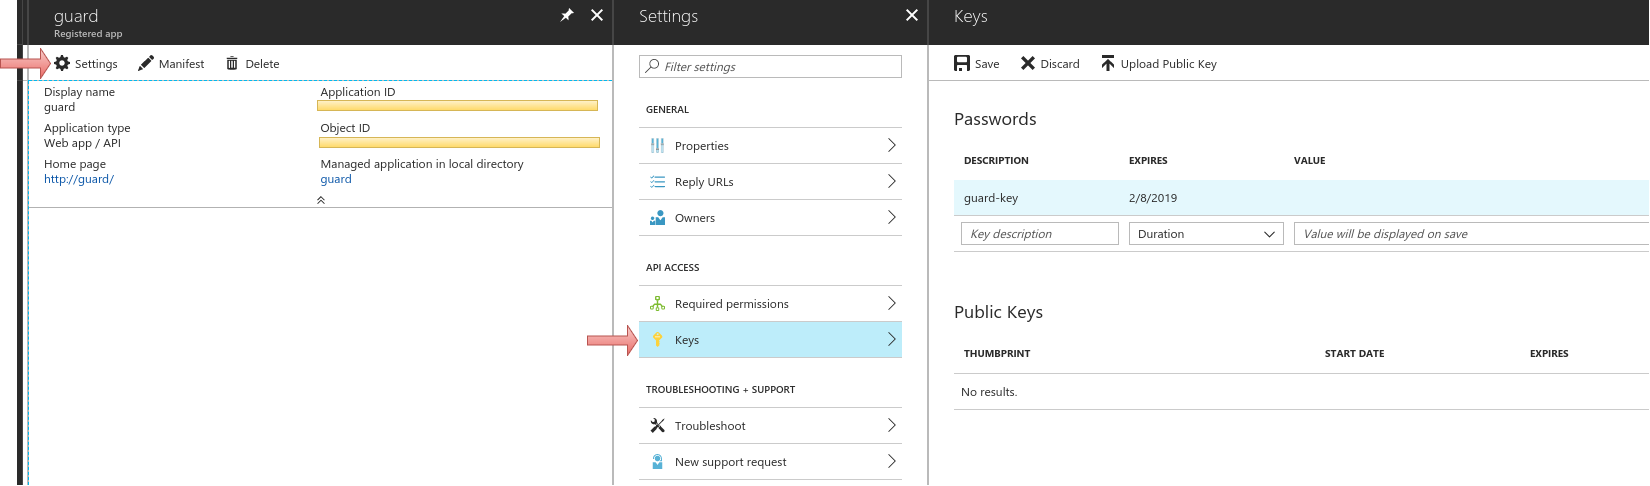
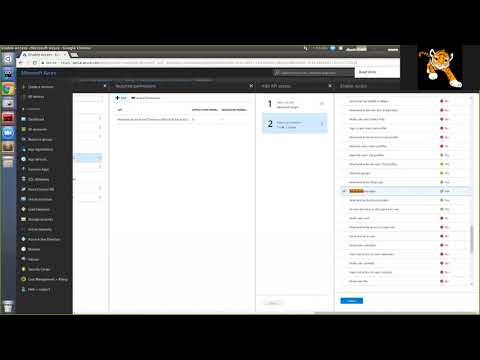
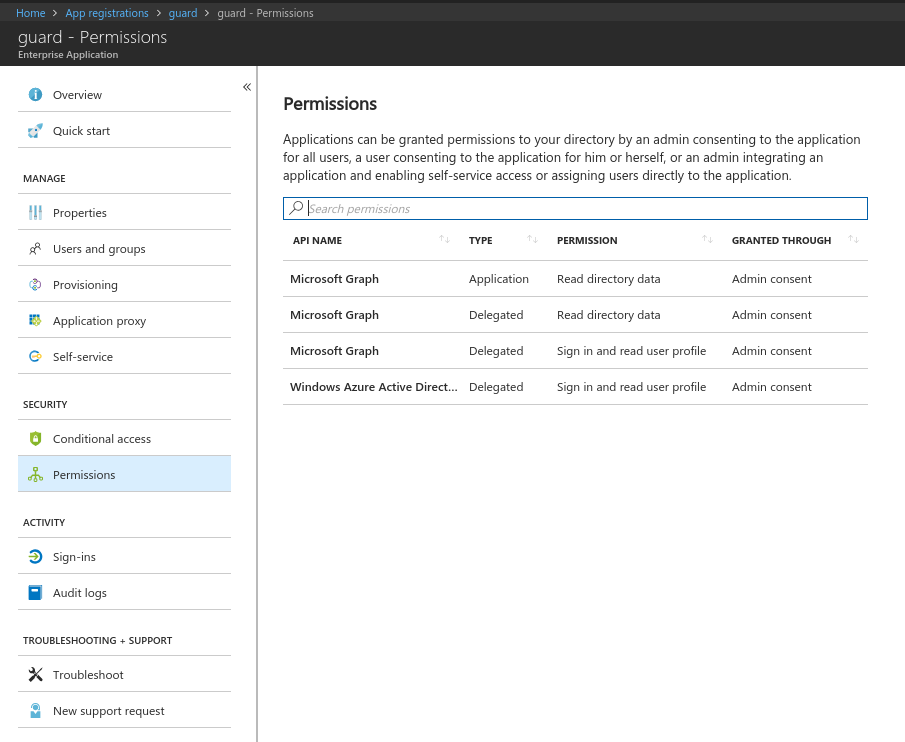
Add Microsoft Graph api with application permission
Read directory dataand delegated permissionRead directory dataandSign in and read user profile.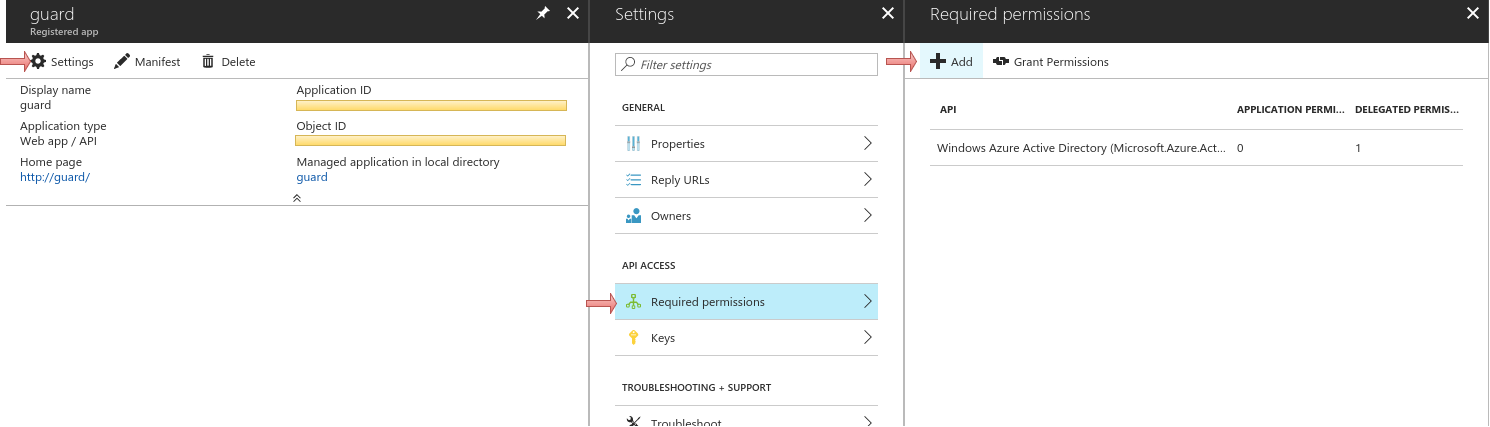
Now grant grant the permission from step 5 for all account to this application by clicking the
Grant Permissionsbutton. Afterwards, check the permissions for this application to confirm that grant operation was successful.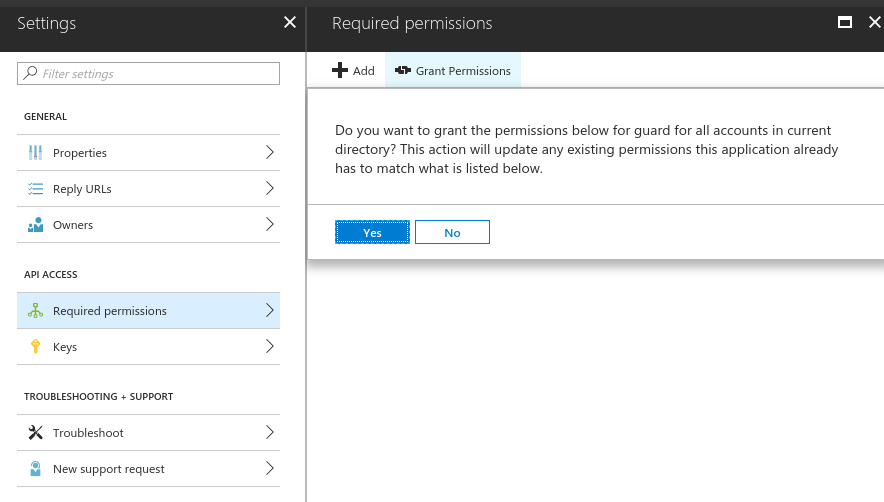
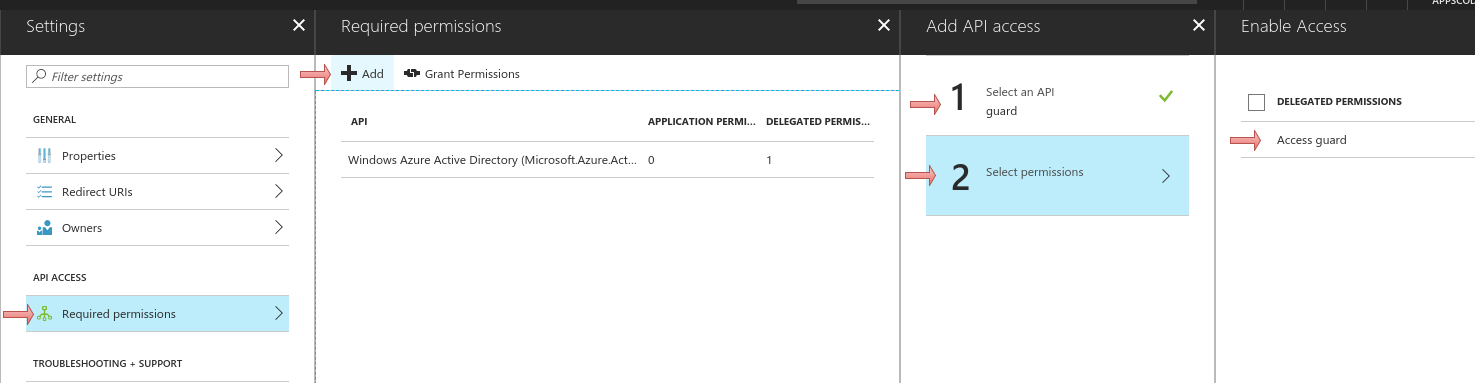
Create a second Azure Active Directory native application
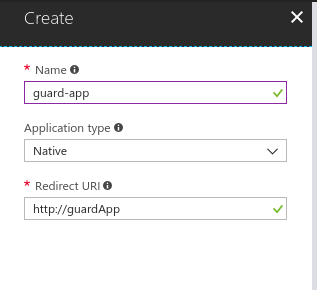
Use the Application ID of this native app as
<client_id>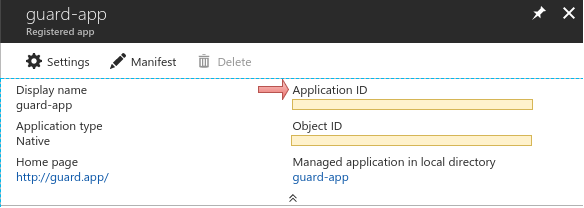
Add application created at step 2 with permission
Access <Application_Name_Created_At_Step_2>
Configure kubectl
kubectl config set-credentials <user_name> --auth-provider=azure \
  --auth-provider-arg=environment=AzurePublicCloud \
  --auth-provider-arg=client-id=<client_id> \
  --auth-provider-arg=tenant-id=<tenant_id> \
  --auth-provider-arg=apiserver-id=<application_id>
Procedure to find <application_id>, <application_secret> and <client_id> are given above. Replace the <user_name> and <tenant_id> with your azure username and tenant id.
Or You can add user in .kube/config file
...
users:
- name: <user_name>
  user:
    auth-provider:
      config:
        apiserver-id: <application_id>
        client-id: <client_id>
        tenant-id: <tenant_id>
        environment: AzurePublicCloud
      name: azure
The access token is acquired when first kubectl command is executed
$ kubectl get pods --user <user_name>

To sign in, use a web browser to open the page https://aka.ms/devicelogin and enter the code DEC7D48GA to authenticate.
After signing in a web browser, the token is stored in the configuration, and it will be reused when executing next commands.